**This post contains Affiliate Links**
Things Used:
- Pink Apron
- Cricut Tools and Accessories
- Siser EasyWeed Heat Transfer Iron On Vinyl
- “Crafty JBird’s Logo“
- Cricut Design Space
- Photoshop Elements 13
- Cricut Explore Air™ Machine
To purchase the products used in this post click on the product you want for the link to Amazon.com.
For this project there are several big type steps so I thought I would just name them based on what they were called instead of my usual.
Design Space:
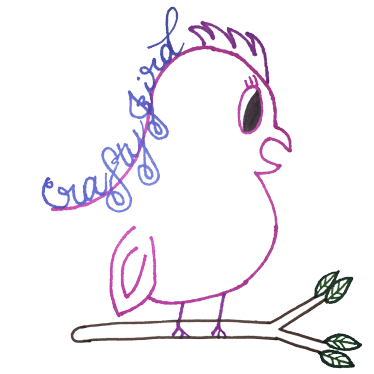
 The first thing I did was upload the individual parts of my “Crafty JBird Logo” into Cricut Design Space. This was based on the different colors I made each one.
 Once I had everything uploaded, I created a new project and got to work. On my apron I decided to use, I measured out for where I wanted my logo to go, which came to be 7.35 by 6.97. To make sure I placed the right color iron-on vinyl on my mat at the right time for the cut I changed each piece to the color to coordinate with what I was planning on using.
After a couple of trial runs with some small pieces lefts over from another project, I decided I needed to change the settings for how my Cricut Explore made my cuts. To do this, make sure you have your machine connected to your computer and then go to the drop down menu and select “Manage Custom Materials.” The ones underlined in pink are the ones I added.
From there, you will see at the bottom where you can select “Add New Material” to create a new setting based on what you want. For this particular project I decided to go with ten less than what Cricut already had as a setting. As you can see, for the Glitter Iron-On Vinyl, I used 210 for my cut pressure. Then, I used 175 for my cut pressure when it was time to cut the Regular/Non-Glitter Iron-On Vinyl. These two cut settings worked perfectly well for me.
Oddly enough, this was the first time I managed to remember to actually change the settings. Fortunately, I now know and I have so many projects I am looking forward to getting done. Anyways, next step….
Cricut Explore Cuts:
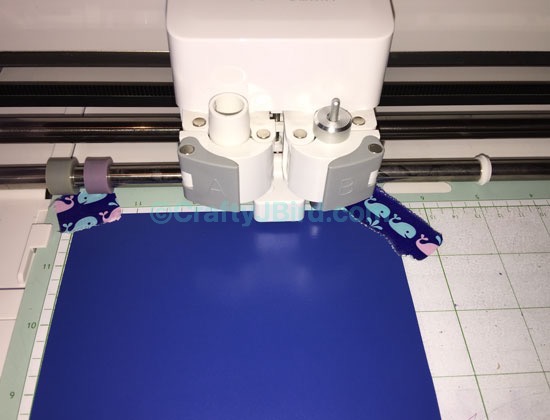
With everything sized accordingly and cut settings ready, I was ready to let my Cricut Explore do it’s thing. I used Siser Heat Transfer Vinyl for all the pieces except for the eye and leaves coming off the branch, which are Cricut brand.
 First, I had it cut out my big piece which was the body of my bird. The backing of this vinyl is white, so it’s kinda hard to tell what is being cut, but I promise it is cutting.
 Next, the Cricut Explore cut out my head feathers and feet. Don’t forget, when cutting iron-on to check the box for the image to be mirrored AND that the dull side of the vinyl is UP! Needless to say, this was my second time to cut all these pieces because I managed to forget that small important piece of information. However, I am giving myself a break due to very sad events during the last week.
 Here, we have the branch of my “Crafty JBird’s Logo” cutting.
 Now, the leaves coming off my branch are being cut out.
 Finally, with the last piece of my bird, the eye is being quickly cut out. It was probably this quickest cut seeing how it was basically just an oval. Click here for a quick video of the Cricut Explore doing its thing for cutting the pieces of my bird.
 Of course, we can’t forget about one of the most important parts of “Crafty JBird’s Logo,” the name itself. I decided to go with blue here just because I had to somehow incorportate the color in being one of my favorite colors and all. Click here for the super quick video of the Cricut Explore cutting out “Crafty JBird.”
Weeding and Ironing:
 With everything finally cut out, I was able to finally get everything weeded and ready to put everything together. Side note: though I used a shade of pink for my body of my bird, the backing of the vinyl is white so I thought I would add the color to it using Photoshop Elements. It wasn’t showing up so great for this picture.
 It’s ironing time, so lets get to it!
 First things first, I put the body of my bird where I wanted it and carefully ironed it on in place.
 Then, I add the head feathers and feet.
 Next, I carefully added my branch making sure it set just right over the feet.
 Once my branch was in place, I carefully added the leaves to the end making sure they matched up to their spots.
  Finally to pull everything together, I ironed-on my bird’s eye.
 With all my bird parts and pieces in place I was ready to put my “Crafty JBird” in place. So, carefully I lined it up accordingly and ironed it on to it’s place.
There you go! A cute “Hand-Drawn, Cricut-Made Apron.” These steps taken can be used with any drawing or image. Hope you enjoyed!
Need an awesome getaway place to go to make all your creative ideas? Visit Memory Lane Inn!
Have any questions about today’s “Make It Monday” “Hand-Drawn, Cricut-Made Apron” post? Please feel free to comment below. Thanks for visiting! Hope to see you again!
Crafty JBird
**This post contains Affiliate Links**


